Professional Configuration and Setup
This section will provide step-by-step instructions for creating Display Configurations and configuring batch jobs for Professional Edition. Display Configurations allow an Administrator to configure List View and Related List for displaying and validating phone numbers. Batch jobs allow periodic scheduled jobs to be run to validate phone numbers.
These instructions apply to the Professional Edition of this product. Professional displays validation data in custom Related List and List View Lightning Web Components. To display validation data on standard Salesforce record pages and list views utilize the Enterprise Edition.
Be sure you have completed the Installation And Setup guide before continuing.
NOTE: this solution utilizes Lighting Components, which requires a My Domain to be setup and deployed in your Salesforce instance. To learn more about My Domain, refer to the Salesforce help documentation
Contents
- Create a Display Configuration
- Add Related List to Record Page
- Add List View to an App Page
- Schedule Batch to Update Phone Numbers Via Filters
- Schedule Batch to Update All Phone Numbers
- Schedule Retry Batch Job
Create a Display Configuration
A Display Configuration is used to select the realphonevalidation.com API, the phone numbers to validate, the validation fields that will be displayed, and if the configuration is for a Related List or a List View.
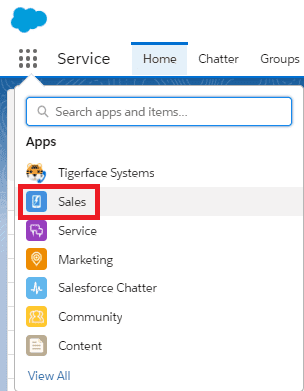
- Click the app launcher icon
- Select the Tigerface Systems application
- Click the Professional tab
- Click New
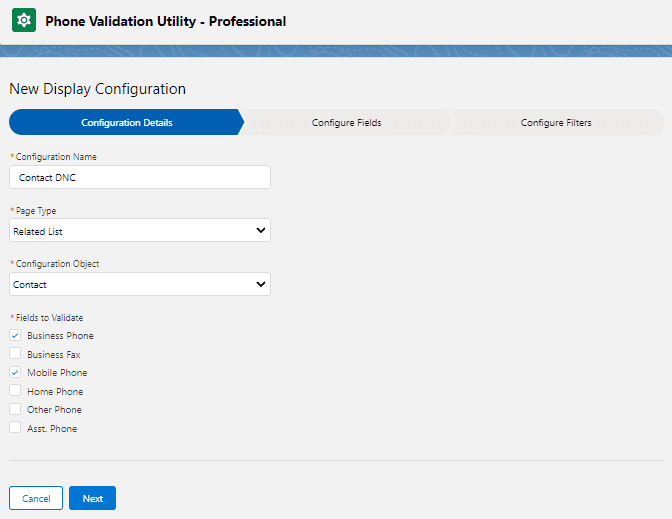
- Enter a value in the Configuration Name text box
- Select Page Type: Related List or List View
- Select Account, Contact, or Lead from the Configuration Object picklist
- Select the Fields to Validate then click Next
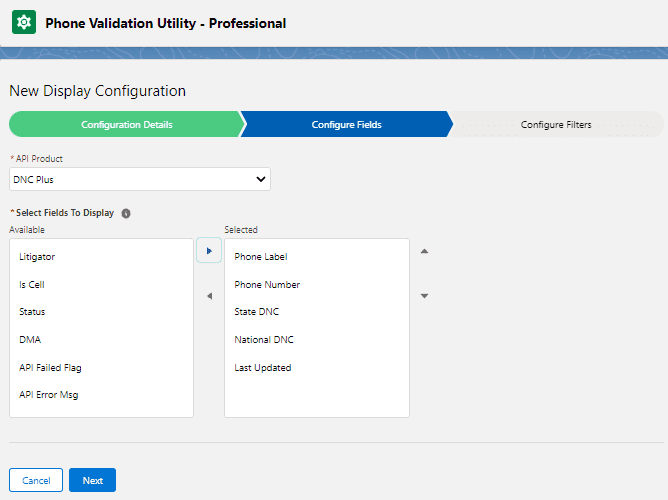
- Select the API Product from the picklist.
NOTE: you must have access to the API from your realphonevalidation.com account - Use the arrow buttons to configure the Select Fields To Display then click Next
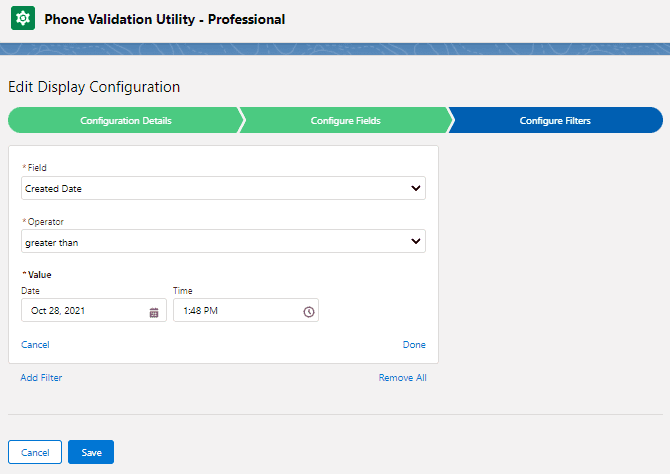
- If this is a List View configuration, you can add a filter. Click Add Filter, then select Field, Operator, and Value, then click Done. Repeat to add additional filters
Note: filters are not supported for Releated List Display Configurations
- Click Save
- Repeat steps 3-11 to create additional Display Configurations
Add Related List to Record Page
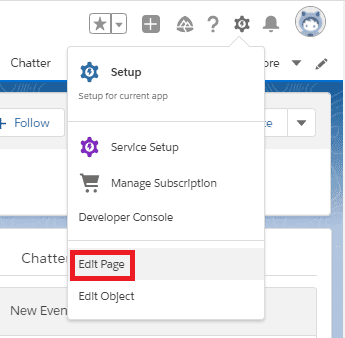
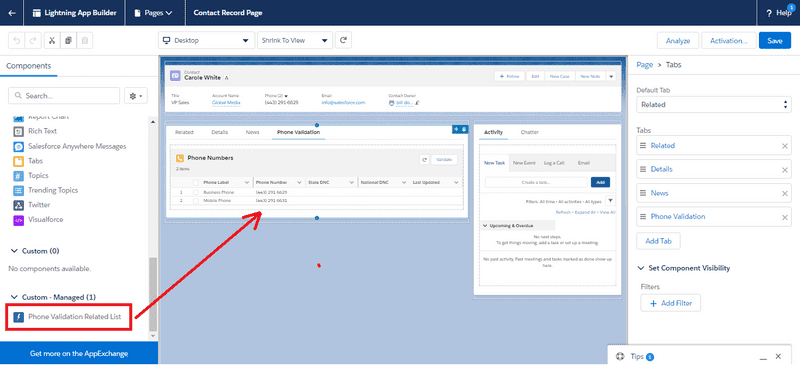
A Lightning Web Component can be added to the record page in order to view the validation data for that records phone numbers.
- Click the app launcher icon
-
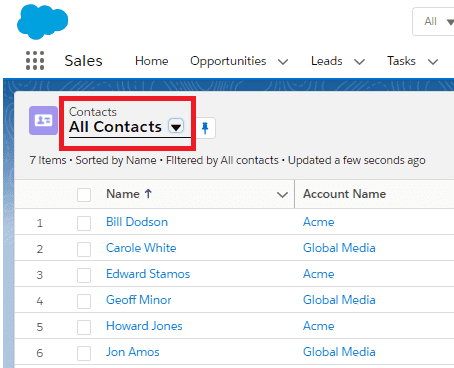
Click on the tab for the object (Account, Contact, or Lead) which you configured for the Display Configuration in Create Display Configurations. In this example we will click the Contacts tab

Note: if no display configurations appear in the drop down then you will have to create a Display Configuration for a Related List of the correct object type. In this example the object type is Contact
- Click Save, click Activate, click Assign as Org Default, click Next, click Save, and then click Save in the upper right of the page
- Click the back button in the upper left to return to the record page
Add List View to an App Page
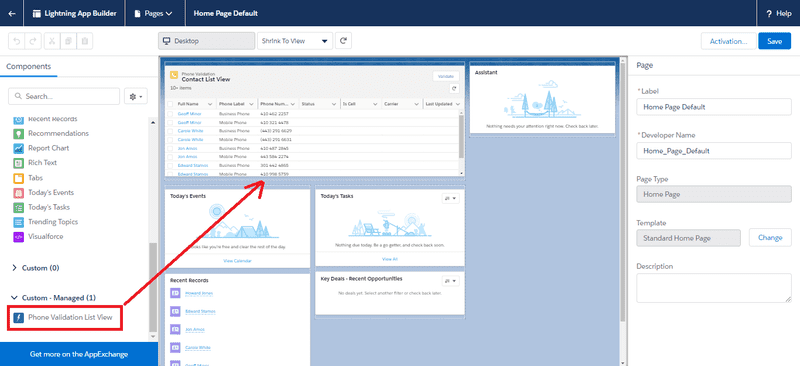
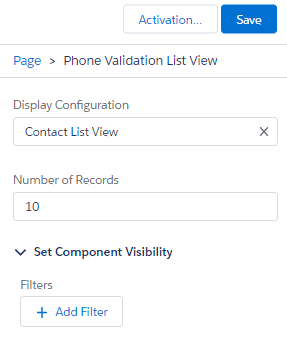
A Lightning Web Component can be added to a page to provide a List View of phone validation data. These steps will provide instructions for applying the List View to a Home page, but it can be added to any Lightning page.
- Click the app launcher icon
Note: if no display configurations appear in the drop down then you will have to create a Display Configuration for a List View
- Set the Number of Records property. This defaults to 10
- Click Save, click Activate, click Assign as Org Default, click Next, click Save, and then in the upper right of the page click Save
- Click the back button in the upper left to return to the page
Schedule Batch to Update Phone Numbers Via Filters
We highly recommended you configure these jobs in a test environment with limited number of records prior to running in production. Misconfiguration with large numbers of records can lead to excessive API calls which will be charged to your realphonevalidation.com account.
This batch job will update all the phone validation data specified by List View Display Configurations which have filters.
At least one List View configuration with a filter should be configured prior to running this batch. List View configurations without filters will not be processed.
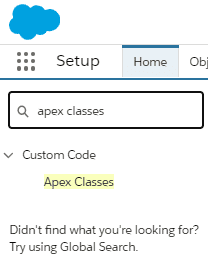
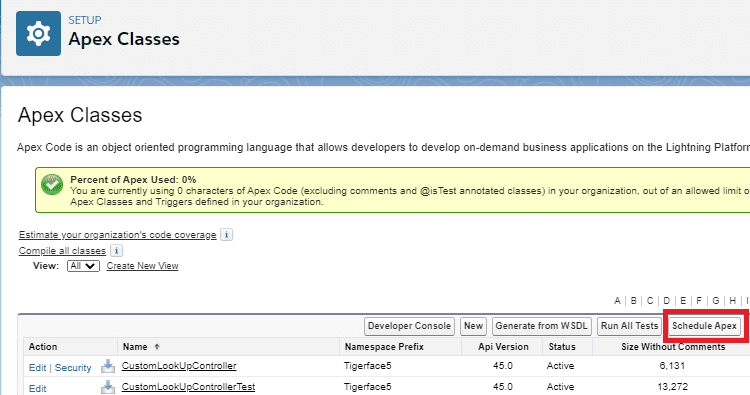
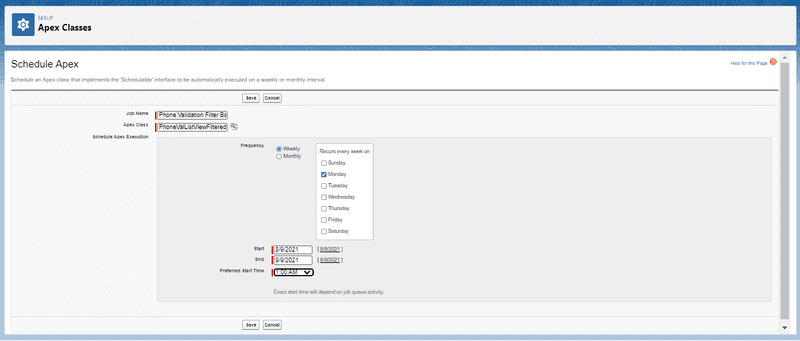
- In the Apex Class text box, enter PhoneValListViewFilteredBatch
- Click the Save button
Schedule Batch to Update All Phone Numbers
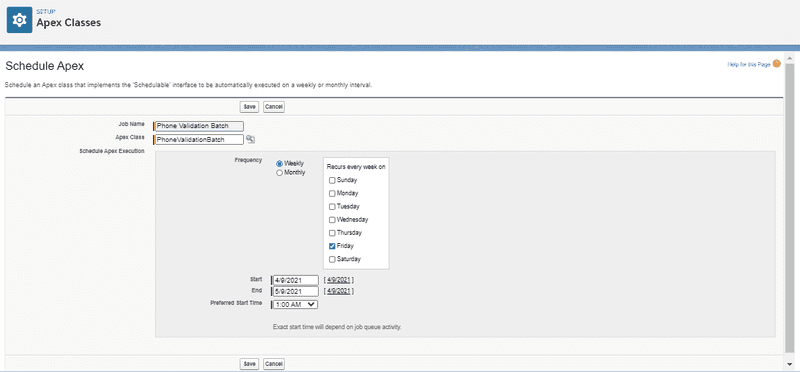
This batch job will update all phone validation data defined by all Display Configurations that have been configured.
We highly recommended you configure these jobs in a test environment with limited number of records prior to running in production. Misconfiguration with large numbers of records can lead to excessive API calls which will be charged to your realphonevalidation.com account.
Display Configuration filters will be ignored and all records in you Salesforce instance will have their phone numbers validated. This should be tested in a non-production environment with low record volumes to avoid excessive charges to your realphonevalidation.com account.
- In the Apex Class text box, enter PhoneValidationBatch
- Click the Save button
Schedule Retry Batch Job
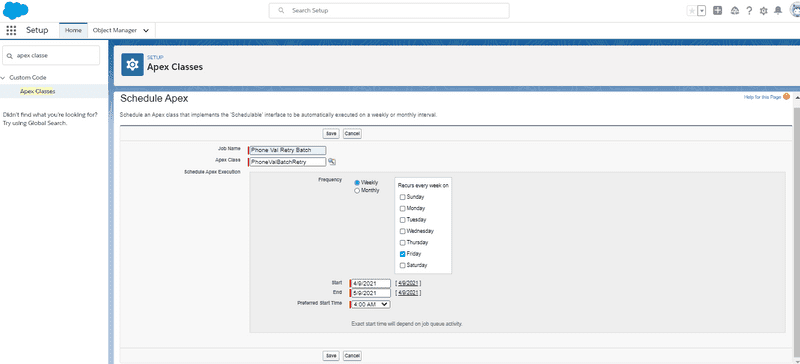
An Apex batch job can be configured to retry any phone number whose API called failed on a previous attempt. API call failures can occur due to network or service outages. These records are identified by the API_Call_Failed__c field on the Phone_Validation__c object.
- In the Apex Class text box, enter PhoneValBatchRetry
- Click the Save button
