Application Installation and Setup
This section covers basic install steps needed before configuring record displays via Display Configurations or validating records.
Contents
- Install the Phone Validation application
- Admin Permission Set Assignment
- Application User Permission Set Assignment
- Set API Token
- Configure Support for Additional Standard or Custom Objects
Install the Phone Validation application
-
Go to the AppExchange listing here and click the Get It Now button
- When prompted log into your Salesforce instance
- Select your environment type: production or sandbox (test)
If you select a Production Salesforce instance you will be prompted for credit card info and be placed into a 30 day trial. If you install into a Sandbox or Developer Edition you will not be prompted for credit card info.
If you would like to install into your Production Salesforce instance for a 30 day trial and not be prompted for credit card info then email contact@tigerfacesystems.com for the application installation link.
- Follow the prompts for the production or sandbox installation
- Select Install for Admins Only
- Click Install
Admin Permission Set Assignment
The Phone Validation Admin Permissions is needed in order to configure the product. To assign the permission set:
- Go to Permission Sets in setup (you can search for it in the quick find box)
- Select the Phone Validation Admin Permissions permission set
- Click Manage Assignments
- Click Add Assignments
- Check the administrator users you would like to assign the permission to
- Click Assign
- Click Done
NOTE: admins are required to have the Customize Application permission in addition to this permission set (System Administrators should have this by default)
Application User Permission Set Assignment
The Phone Validation User Permissions is needed in order for application users to use the product. To assign the permission set:
- Go to Permission Sets in setup (you can search for it in the quick find box)
- Select the Phone Validation User Permissions permission set
- Click Manage Assignments
- Click Add Assignments
- Check the users you would like to assign the permission to
- Click Assign
- Click Done
For Enterprise Edition the Flow User permission must be enabled on the user's record.
Set API Token
An API Token is required in order for Salesforce to access APIs published by realphonevalidation.com. To configure the API Token:
- Click the app launcher icon
- Select the Tigerface Systems application
NOTE: the first time this application is displayed you may experience a delay (10 –20 second) in the user interface rendering. This is due to Lightning Component caching by the Lightning Platform.
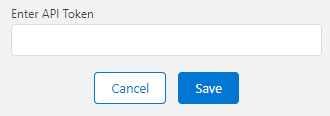
- Click the Set API Token button
- Enter the Authorization Token value received from realphonevalidation.com. NOTE: an account with realphonevalidation.com is required
- Click Save
Configure Support for Additional Standard or Custom Objects
The Phone Validation product provides support for Account, Contact, and Lead objects by default. To validate phone numbers on other Standard Objects or on Custom Objects:
- Go to Object Manager in setup
- Scroll down and click the Phone Validation object
- Click on Fields and Relationships
- Click New, select Lookup Relationship, then click Next
- In the Related To drop down, select the Standard or Custom Object
- Enter Field, Field Name, and Description values
-
Leave the Required field unchecked.
NOTE: if Required is checked, then application errors will occur - Click Next, click Next, click Save
After the above steps are completed, configurations can be created for that object. Repeat the above steps for additional Standard or Custom Objects as needed.

